Website Design (DIY Guide)

Paul Barrs – Conversion and Website Design Specialist.
Content Summary: For those with limited time –
This page covers all the basics when it comes to redesigning or redeveloping your website
Does it cover everything? No. Just the essentials and those things which must be done.
This guide has been created for two reasons –
(1) To help those small business owners who are not yet able to engage a professional team to help them with their website redesign. They (you) can use this guide as a starting point to help you learn what you need to do, or learn more about.
(2) To show those business owners who are looking to engage a professional team to rebuild their site what WE do with each project.
If you’re looking to get more business, sales and leads from your website (continue reading) or contact us for more information.
– Paul Barrs
Contents
1. Is Your Website Mobile Friendly?
The NUMBER 1 Question People Ask about Upgrading a Website to Mobile-Friendly:
The Things That You Have Some Control Over
The Encryption of Data Transfer
What You Need to Know / Ask When Buying a Website Theme / Template
Optimising the home page for page speed.
Introduction:

No matter which way you look at it, the process of redesigning (re-developing) your website is an arduous task. Simply put – it’s horrible, it’s difficult, it’s time consuming and it’s often costly!
So why on gods green earth would you do it? Why? Because your customers need you to.
As technology changes, so do consumer expectations. Since mid 2015 when Google rolled out the original “mobile-friendly’ update, Google has kept pace and required all website owners to do the same. Even Google’s current “mobile-first” index continues to evolve with continued tweaks and turns, designed to keep website developers on their toes.
And whether you like it or not, that includes you!
I’m not going to bore you with statistics and numbers about how many people use mobile search, I’m sure you’ve heard the numbers. The point being, that the numbers are growing and website owners who don’t offer a good mobile experience – depending on industry – are being left behind.
Is Your Website Mobile Friendly?

Mobile Friendly Websites are Essential!
Take a quick look now at Google’s updated mobile-friendly test to find out: Click Here.
The most important elements are –
- Is the text easy to read on mobile?
- Do the images / pages load in reasonable time?
- Is it easy for people to find what they need?
If you answered ‘no’ to any of these, then perhaps you need to make some updates.
The NUMBER 1 Question People Ask about Upgrading a Website to Mobile-Friendly:
I have a WordPress website? Can’t I just update to a new theme?
- Sure you can. Be aware however of the following pitfalls…
- (1) Sometimes a theme upgrade can completely destroy a site’s current page layout, and whatever work you’ve done before to make your site look good will go out the window.
- (2) Its very probable that any images you were using before will no longer fit neatly into your new design theme. These will need to be revisited / re done.
- (3) Unless you’ve done this kind of thing before, and things go wrong, you can be left without a site for weeks / months until the new work is complete.
Here are 2 things you can do to mitigate possible problems:
- First and foremost – BACKUP YOUR SITE before doing any theme upgrade.
- It’s best to work ‘off site’ from your live site. Create a clone copy of your site and unpack it on a safe ‘demo’ or ‘staging site’ for the time period that your site is being re-built
Other things you should also consider –
- Is this a good time to review your message?
- Will you need new images, content or copy?
- Should you add / start a blog if you’re not blogging already?
- Is your current hosting suitable for a growing business, or did you grab it in the beginning because it was the cheapest around?
These questions and others need to be asked.
Or, you can let us do the work for you. We have hundreds of website upgrades under our belt and can make sure that the job is done in a timely, friendly and professional manner.

Page Speed and Load Times
Second only in importance to mobile responsiveness, is page speed or load time (how long it takes for a page to load). This of course depends mostly on the viewers device and actual internet data speed, but considering these things are out of our control, we can only focus on those elements we have ‘some’ control over
- Website Tech
- Server Speed
The Things That You Have Some Control Over
 Currently WordPress websites account for nearly 25 % of all new website development globally, making it by far the most popular website CMS on the planet. However, it is also one of the most annoyingly SLOW CMS’s on the planet – unless you know how to tidy tings up!
Here’s my Quick List of things that you need to address either (1) during your new website build or (2) once it’s competed.
Use a lightweight theme design
- This is one of the key areas. A heavy design theme can blow out your load time by as much as 50%!
Reduce image sizes
- Again, another key. I always recommend that the images you upload to your WordPress media library already be optimized for the web. And yes, we know that there are plugins out there that will do this, and that the WP media library will resize your images anyway – but the BEST WAY is to do it yourself before you upload them.
Minify your JavaScript and CSS
- This might sound like a techno-babble but it’s not for the right person. If you did the Google Page Speed test above, chances are you saw that this was high on the recommendation list. It needs attention.
Use advanced caching
- Caching plugins have been around for a long time, and it’s almost become essential that you use one. They can speed up your load time considerably, especially for returning visitors.
Use a CDN
- A CDN (content delivery network) helps by creating ‘replicate copies’ of your website and hosting them in strategic data centers around the globe. They are a great tool for websites that generate high volumes of traffic or acquire traffic from all around the world. There are many good CDN’s out there; do some due diligence and then select the one that will best serve your customers.
Enable GZIP Compression
- Have you ever used a zip program to store items on your computer? Just as zipping up files on your hard drive can save you space, using GZIP compression on your website does similar – ‘zipping’ up files so that when they are downloaded and accessed by a web browser, the load time / bandwidth is reduced.
Keep your plugins to a minimum
- If you’ve been working with WordPress for any length of time, then this one goes without saying! Simply put, use as few plugins as you can and always disable / delete those that you don’t need.
- Also, ALWAYS keep your active plugins up-to-date to help prevent security issues (see below).
Clean up your WP database
- Here’s another from the ‘WordPress Users Club’… keep your database clean. That simply means spend the time to do regular maintenance such as delete and remove any spam comments and delete old unused pages / posts. We recently did a complete upgrade at PaulBarrs.com and in the process I reviewed every single page for ‘present day’ accuracy (things change a lot in my industry) and ended up deleting over 250 pages and posts. Others I put into draft mode for later re-writing, but the important job was to clean out the database of any unused / unneeded content.
Disable Pingbacks and Trackbacks
- This refers to a tool within WordPress that notifies you of links back to your site. You don’t need it as it can put unnecessary strain on your WP management, and besides, Google offers much better related information through Search Console.
Keep external scripts to a minimum
- Lastly, though by no means least, keep the number of scripts / code that needs to be added to your site to a minimum. I’m talking about things such as Google Analytics or Facebook’s re-marketing code (tracking pixel) or comment management plugins. These things ALL take time to load. Only use those that you must, or, start using Google’s Tag Manager to speed things up.
Obviously this list isn’t complete, there are always many things that you can do; but it does cover the most basic elements that anyone with a moderate level of web development experience can manage.
Remember, the biggest advantage that you can have over your competitors is the ability to get your information into your customer’s hands as quickly as possible.
Don’t make them wait around to get it. Test out your page speed today and get started on improving it – or, give us a call and we’ll do it for you.
Website Security
 There are a number of areas that are essential to the management of good website security. They are –
- The use of strong passwords
- The removal of default login options
- The encryption of data transfer
Let’s take a look at them one by one –
The Use of Strong Passwords
Most people use passwords which they find easy to remember, and while there’s nothing wrong with that, most passwords which are easy to remember are also easy to hack!
Here’s the thing, when someone tries to hack your site, it’s not a person per se’ that does it, it’s a bot; a computer bot which runs an algorithm across whatever login portal it’s trying to access probing for weak spots.
The number one rule for creating and using passwords online is make them something you CAN’T easily remember! Well, not really, but here’s what I mean.
Also –
- Use both numbers and letters
- Use both UPPERCASE and lower case letters
- Throw in a few symbols as well $#@
Here are some examples; a birthdate – 25th March, 1979
- The password could be 250379
This, according to HowSecureIsMyPassword.net, would take 25 Microseconds to crack!
- How about 25march79?
That would take about 40 minutes for a computer bot to crack.
- Add in a capital ‘M’, 25March79… 4 days to hack.
- Add in a symbol such as, 25March!(79… it would take 400 years to hack! Much better!!
All I did here was write 25th of March 1979 in different ways; such as using the symbol that appears on my keyboard above the 1 and the 9 to add in some symbols.
And no, for all those wannabe hackers reading this, my passwords ARE NOT some combination of my birthdate!
The point being however, you need to be using some kind of password ‘system’ that has numbers, letters, upper case and lowercase AND at least 1 symbol.
Lastly, you really should make them at least 15 characters long.
If you go to StrongPasswordGenerator.com the recommended password length is 15 characters. It also allows you to randomly generate passwords that are nigh impossible to crack.
Here are 3 examples…
- 3[og%25sSh!s2wd
- %14>,KM:?7?P,3o
- LA(ZZ5auN&Y$HqF
Each of these when tested on HowSecureIsMyPassword.net would take more than 4 Quadrillion years!!
What’s that in zeros?
- 4,000,000,000,000,000 (4 x 10¹⁵)
A long, long time!
The problem is, these are impossible to remember, but they prove a point.
For my most important passwords, I use ones like those above; for the not quite so important, I use a numbers / letters / symbols system.
Thus my passwords have never been hacked.
The Removal of Default Logins
 The best thing about the various CMS’s that are used in web development these days (content management systems) is that they are very easy to use.
The worst thing about them is that they’re very easy to hack!
Why? Because each and all of them come with default setup options that most website developers never change – and hackers know this. Therefore if they’re going to target you, all they have to do is target vulnerabilities in your default settings and if found – they have you!
This section covers the basics of those things you need to modify when setting up a new website (we offer this as a service to all customers).
I’m also going to assume that you’re using WordPress for the purposes of this article (not because you most likely are, but because nearly 30% of ALL new websites are – and that makes WordPress the most popular CMS around).
So if you’re using WordPress (a self-hosted WP site that is), please make sure you do the following:
Don’t use ‘admin’ as your username.
- This is an absolute essential! It’s dead set easy to figure out what the primary username is for a WordPress website and ‘admin’ is the default. This is the default username that all hackers start with, and if you haven’t changed your login username, then you’ve just given the hackers 50% of the information they need to access your site.
Hide your wp-config and .htaccess files.
- This is where is gets more technical and if you’re not technically minded then you need to leave this alone and have a professional web-tech do it. But – these are files that hackers love to get their hands on; and if they do, will basically own your site.
Disable WP file editing options.
- Worst case scenario and you do get hacked, if you’ve disabled the WP editing tools then at least the hackers won’t be able to edit your files. You’ll still be able to do it via FTP or similar, but not through the WP dashboard.
Limit login attempts.
- This one is easy, with a number of plugins that can manage it for you. Explained simply, if a hacker tries to get in and they fail, that’s “login attempt 1”, and then 2, and then 3 and so on. I have my site set to “fail 3 times and you’re toast!” meaning, you’re IP address is blocked for 48 hours. It’s a great system, except for those few times I’ve forgotten my password and locked myself out!
Disable the xmlrpc.php file.
- Though important, tread carefully here. This file is used in various API’s for a number of plugins and can break things if needed and you disable it. I suggest you test things slowly, one plugin at a time, and if you don’t need this file… disable it (it’s enough just to change its name).
Change the default login URL.
- This is also a big one (and an easy one). Make sure that you get rid of the default /wp-admin or wp-login.php file – as in, change their names to something more random that a hacker won’t guess. There are various plugins that can do this, or you can ask us to look at your website security for you and take care of it.
This is just a shortlist of the most important items that are easily done. It’s important that you take your CMS security seriously, because there’s nothing worse than getting a phone call from a client telling you that you’ve got a dancing Arabian Girl on your home page singing Lebanese wedding songs (and yes, that happened to someone I know many years back!)
The Encryption of Data Transfer
This section refers to the use of SSL certificates to encrypt data transfer between your client’s browser and your website.
It’s the difference between your client’s contact information or order information being secure and not – and these days it’s no longer necessary to only offer this when taking orders online.
In January 2017 Google started showing ‘not secure’ in its search results for those sites that were not secure. Following shortly afterward all the major browsers such as Firefox, Chrome and Internet Explorer started showing similar messages for pages that had even a simple form on them, but where not ‘secure’.
SSL has also long been considered a possible ranking signal for SEO in Google search results.
Watch this short video to learn more about SSL Certificates:
So… what should you do?
Take a look at your site in your browser and see if it has https:// (the S) at the beginning of the URL or if it’s just http:// (no S for Secure).
This is what mine looks like in Google Chrome.

Also, make sure you have the secure padlock showing; it’s not enough to have just ‘installed an SSL certificate’ on your site / server – all elements of the site have to be secured as well!
Here are the salient points to take note of (in laymen terms) –
- There are different levels of SSL certificates (shared, dedicated etc).
- The SSL certificate that you buy needs to be set up not only for your domain name, but for your hosting server as well.
- A standard SSL certificate will cover your Top Level Domain domain only. A wildcard SSL certificate will cover both your TLD and any sub-domains you have in place also.
- SSL Certificates are not a one-time purchase, they renew annually (or on whatever payment cycle you purchase on).
- If you move hosting from one provider to another, you may need to get a new certificate issued. It’s not always possible to transfer.
- The 3 elements of an SSL certificate are –
- The CSR (Certificate Signing Request)
- The Private Key
- The Public Key
And if you’re going to purchase and install your SSL certificate yourself, you need to understand what each of these things are.
Fortunately we’ve made is easy; you can purchase an SSL certificate HERE. After purchase we’ll be in contact to get your server / hosting details and take care of setup and installation for you!
Theme Selection
The ‘theme’ or ‘design layout’ plays a major part in the shaping and success of your website, and not just in the areas of ‘design’ (how it looks). The theme / design choice also affects the following –
- Page load speed
- Mobile responsiveness
- Page layout options
- Blog layout options (how your pages / posts can be structured / displayed)
- Overall user friendliness (the UX / user experience)
- SEO options
- Editing options
- And more –
These are just the basics! So it’s important that you make informed choices when deciding your design theme.
For the purposes of this section, I’m going to be referring to options that reflect a WordPress design theme. Why? Because I know that 1 out of 3 people reading this page either now has (or will have soon) a WP site.
The concepts however can be carried over to any modern CMS. Let’s look at the above options in a little more detail –
What You Need to Know / Ask When Buying a Website Theme / Template
Page load speed.
- As previously discussed, this is a huge one. When I’m selecting a theme for a new client, one of the things I do is run the developers sample site through a page speed tool to see if it stacks up; my thoughts being that if it doesn’t run fast ‘out of the box’ then it’s going to take a lot more work to get it to do so.
Mobile responsiveness.
- Again, another super important one, but fortunately easy to test. Once more, you want to run the developers sample site through some testing tools.
Page layout options.
- This one mainly affects how you want to present your sales message. When you’re going through the developer’s sample site, take careful note of the sample pages / page layouts. They don’t need to offer bunches, but at least half a dozen options would be good. Make sure at minimum you have access to a full-width page as well as a 2 or 3 column layout pages. Look also at any ‘short codes’ you may have access to as well. These small snippets of code allow you to do some pretty special stuff with your page layouts without having to know HTML code.
Blog layout options (how your pages / posts can be structured).
- Yet again, look at the developers demo site… Do you like how the blog is set out? Are there other options available? Personally I like the ability to have a featured image and then a snippet of my blog post showing as a summary before people click through to read the full article. And, as a sidebar – ALWAYS display a summary on your main Blog page (never the full article); and then have people click the ‘read more’ to get the complete content.
Overall user friendliness (the UX / user experience).
- Look at the menu options, in conjunction with the page layouts. Is it easy to navigate around? Check the menu on mobile too… and when building your own site, keep your menu options to a minimum.
SEO options.
- Most themes these days make allowance for a nice SEO plugin to be added in (if it’s not built in). Make sure that you can do this. Look also for built in H1 tags into the page code. Believe it or not, not all themes come with this essential element ready to go.
Editing options.
- Lastly, you’re going to want to know how ‘easy’ is it to use on the inside and edit – and this is going to depend on you and your technical ability. While the Divi Editor is a great Visual Editor, if you’ve never used it before, it’s a massive learning curve. My preference is still the built in WP ‘text editor’; but that’s because I started out back in the 90’s when code was all we had to work with! You need to make sure you ask the questions first so you know what you’re getting into.

And Don’t Forget This!

As you’re reviewing the various themes that you can purchase and license for your site’s use, take some time to read over reviews from other users. Don’t bother looking at the good ones, go straight for the bad ones! Look and see what people are saying about both the theme and also the developer; is the theme user friendly? Is their support any good? Do you (can you) pay extra for extended support?
Before you go ahead and purchase a theme – just because you like the look of it – find out what’s wrong with it first!
Home Page Setup
Without doubt, the most important page on your site is your home page as it’s the one most likely to be the first point of entry for a new visitor –
However – quick sidebar – it isn’t the ONLY entry page; especially if you’ve written some serious content or gained some great results in SEO.
That aside though, the first page you want to optimise on your site is your home page.
- Optimise it for page speed
- Optimise it for SEO
- Optimise it for conversions
Optimising the home page for page speed.
 We’ve already dealt with this earlier; but let me remind you of my number one tip… if you’re going to use a featured image in what’s usually referred to as the page slider (that’s the big-ass image that goes up near the top), make sure that you optimise it for web download. It’s possible to have an image which is up to 2000 pixels wide, but still less than 100 kb’s in size.
>> The ‘size’ of the image refers to how big the file is, not the image dimensions. ie. 150 kb (kilobytes) would be a fast loading large image, but 1.5 Mb (megabytes or 1,500 kb’s) is not a fast loading image. And if you’re taking photos straight of a digital camera and uploading them to your website, you’re making a SERIOUS MISTAKE. I’ve seen images uploaded direct from a camera that are 4, 5 and 6 Mb’s in size. These can take ages to load from a website!
>> The dimensions of an image however, refer to how large the image is by width and height. For example 1750 px wide (pixels being unit of measurement in digital graphics) by 750 px high is a nice sized ‘home page featured image’, and if optmised for web, will still load fast.
Your theme design will determine what dimensions your images should be.
Optimise for SEO
The next thing you want to do is optimise your page for search (search engine optimization). And while we’re not talking in depth about SEO in this document (you can grab my eBook called SEO Essentials for Small Business to learn more), there are some basics that must be covered in relation to the home page.
They are –
* A good Meta Title. This is the code of the page which then appears as the blue link heading in search results. It will often also appear in the top tab of your web browser such as Firefox, Chrome, Safari or Internet Explorer. This is by far the most important element for SEO on the page as it tells both Google – AND YOUR CUSTOMERS – what the page should be about.
* The second most important element is the Meta Description; and like the meta title is very important as it often appears in the search results, giving your customer (who search and see it) more of an idea of why they should click through to your website. Have a look at my training video and free meta-data tool at MetaLength.com.au to learn more.
* Your Page’s H1 Heading. The H1 is a piece of code that tells the web browser that this ‘heading’ is the most important. It also tells the browser how to display the heading in terms of size, colour, and font (which are usually determined by the CSS in the design code). How your pages ‘look’ are very important to the user, but as far as SEO goes, the H1 heading tag should let the user (and the search bots) know what the most important thing about the page is!
* Other content on the page. Yes, it’s obvious that the content on the page should be relevant to the customer, but it must also be relevant to the meta title, description and H1 tag – they all work together! If any of them are ‘out of sync’ then you’re setting yourself up for failure. And no, you’re not allowed to just repeat, repeat, and repeat with your content and keywords (more on that another time). Use your content to help your visitor get further into your site.
* Internal links – this is the final key, use those links to help your customers get further into your site to find the relevant information / products / services that they are looking for. This is also very important for SEO as it relates to the overall user experience as a whole.
The One Click Philosophy
Speaking of the user experience, let me share for just one moment what I like to call The One Click Philosophy… Whenever someone lands on your website, they should be no more than ONE CLICK away from what they are looking for.
It doesn’t matter whether they landed on the home page or an internal page, nor does it matter WHERE they come from.
What matters is that wherever they land (whatever page they see first), they must be no more than ONE CLICK from what they are looking for.
THEN – once they get to the page / product / service (that they are looking for), they should be no more than ONCE CLICK away from what YOU are looking for… the sale, the subscription, the lead, the enquiry… whatever it is.
One click to what THEY want and then one click to what YOU want.
Think about that when it comes to the layout of your home page!
This Slideshare Presentation Outlines my One Click Philosophy (as I’ve spoken about at many a breakfast presentation).
Optimise for Conversions
Just like the One Click Philosophy (above), your home page must be set out in such a way that it gives the customer what they want in the shortest possible time. Simply put, don’t make them wait, and do not make them go looking!
You know your product or service better than anyone – use your insider knowledge to apply the 80 / 20 rule –
Understand that either (1) 80% of your profits / sales are likely to come from just 20% of your product range (in which case you should make *them* really easy to find), or (2) 80% of your sales are likely to come from just 20% of your customers (or customer types).
Do you know who your ideal customer is? Have you done the market research to understand how they shop, what they’re looking from, and when (at what point in the buying cycle) they’re likely to buy?
Find out what the majority of your customers are likely to buy and who they are – then optimise your site accordingly.
Don’t fall into the trap that because John Smith has been successful doing XYZ that you will be successful doing XYZ. It all depends on your target customers and what type of buying cycle they have.
Two types of customers
Here’s the simplest way I know to explain it… there are two types of customers; those who know what they want, and those that don’t.
See, I told you it was simple!
OK… not so much. Think of it this way –
Those who ‘know’ what they want are those customers who are educated. They’ve either purchased the type of product before or they have done enough research to understand what the different options are and what they need to know before they buy; be it product or service. Annoyingly, they may appear to you or I as people ‘who know it all’, not because they do, but because they ‘think’ they do.
This type of customer has done their research, and they’ve learned whatever they wanted to learn, and they’re now READY to purchase.
It is my belief that these people represent about 20% of the consumer marketplace.
Then there are the second group, the 80%… these are the people who want to ‘buy’ something to do / achieve / get an outcome that will do X. They know what they want done, they just don’t understand enough about what they want to buy to actually buy it! They’re not yet confident in their buying decision.
Want to know more about customer types? Watch this explainer video:
Want some HELP YOU with your SEO!
They are still in what’s called the discovery phase of the buying cycle.
Last year I was in the market for a new television, I knew I needed a television, and I knew what it ‘did’ (duh), but what I didn’t know was which darn television should I buy because there was like a gazillion options.
First thing I did was decide on a price point.
Then I did a bunch of research online because I didn’t want to look like an idiot when I went into the store.
Once I’d done my research, I figured I knew enough to at least be able to ask the right questions.
And then once in store I asked further questions which the sales rep answered for me – and it was at THAT MOMENT that I went from a browser to a buyer.
I decided on WHAT I was going to buy, I just had to decide from WHOM I was going to buy it.
That moment is called the ZMOT… the Zero Moment of Truth, when you go from someone who is trying to decide ‘what’ to buy, to someone who knows what they want, but just to decide WHO they will buy it from.
And that my friend, is the buying process as viewed through your customers eyes!
So… on your home page… you need to get your customer to what it is that they are looking for AS QUICKLY AS POSSIBLE!
And do so targeting the 80% of people who are still trying to decide what is best for them, AS WELL AS, the 20% who are ready to buy, but just deciding who to buy it from.
Provide information to both types of customers on your website, and you’ve discovered the Winning Formula.
Site page structure
One of the other crucial areas in website redevelopment is the way in which you structure your pages and permalinks – and while there’s been a lot of debate on this – here are two solid rules that you cannot ignore.
The Rules for Page URL’s
Set out your pages and posts in a manner that makes logical sense.
- ie if you have a number of products that fall under the same xyz category, then it makes sense to list them under URL’s such as –
- yourdomain.com.au/xyz/product-01
- yourdomain.com.au/xyx/product-02
- yourfomain.com.au/xyz/product-03 etc etc.
- You can do the same for your various services, for your blog posts and so on.
Make sure that your most important pages / products are easy to find and linked from your home page and / or top menu bar.
For example; at PaulBarrs.com we have a number of services such as website design, SEO, conversion analytics, website marketing and so on… but the most popular such as website design and digital marketing have links on BOTH the home page AND the top menu.
- Also, with exception to my blog, all my top menu pages (the most important ones) are placed directly underneath my TLD (top level domain).
- paulbarrs.com/website-design
- paulbarrs.com/seo
- paulbarrs.com/digital-marketing
- These are incredibly easy to remember for customers, and, not being ‘sub-pages’ are more likely to show up in search results all other factors aside (plus when they do, they look awesome!).
As mentioned above, it’s very useful to group related things together. ie…
- I have a number of featured articles that all show up under paulbarrs.com/featured
- All of my blog posts show up under paulbarrs.com/blog
- And then each of them under their own category…
- paulbarrs.com/blog/seo/article01
- paulbarrs.com/blog/website-design/article02
- paulbarrs.com/blog/content-marketing/article03
The only downside to doing this is that if you go by the old school SEO rule of making sure that you have ‘all your keywords’ showing up in your URL, then your URL’s can get very long (and very messy).
My suggestion..? Don’t go by the old school rule!
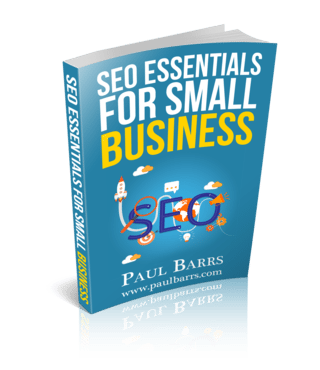
Learn More about SEO. Download my Free eBook ‘SEO Essentials”
100% Secure. We Never Share Your Email.
If you’re a carpet cleaner and you’re optimising your page URL’s for different suburbs, you DO NOT want to have URL’s like carpetcleaningcompany.com.au/northside-carpet-cleaning/carpet-cleaning-suburb-name
Ugh!
If it looks like you’re trying to jam in as many keywords as you can, then you probably have too many. It looks dumb to the consumer and Google hates it with a vengeance.
The painful part is that it worked a long time ago, and sometimes pages from those sites built like this a number of years ago are still ranking. However, they’re old, they’re out of date, and it’s my opinion that they won’t stay to top forever.
The simple rule of thumb is ‘if it’s good for the customer, it’s good for Google’. That applies to your page URL’s, your website structure and the links from one page to another.
Speaking of links… here’s my bomb-proof strategy for getting both customer and Google love when it comes to your site content and site structure –
Cornerstone Content Pages
Take a moment to look at your products, your services and the ‘topics’ that surround what it is that you do / sell / supply.
Chances are there’s about half a dozen different ‘topics’ that could cover most of your business; broad topics that cover a good number of ‘sub-topics’.
Think about it like this….
THIS PAGE is about diy website design. Does it cover everything there is to ‘know’ about website design? No. Does it cover a number of sub-topics within the very broad topic of website design? Yes.
This Video Explains in detail:
We’re talking about –
- Mobile design
- Page speed
- Website security
- Design themes
- Page design
- Site structure
- Google setup
- And more…
THIS page is what’s called a Cornerstone Content page; a page that covers a range or specific topics within a very broad topic. Have you noticed that I have a number of links from this page to others on my site? Why?
Because it’s good for my customers to be able to access further information on this topic if they want it.
Plus, if you take the time to look around, you’ll also notice that I have a number of Blog Posts on the various ‘sub-topics’ listed just above; and one by one I’m going back now and linking ALL OF THEM to THIS page.
Why?? Because it’s good for my customers to be able to access further information on this topic if they want it!
This means that this page has a few links out, and a whole lot of links in… links which are great for my customers and good also for Google.
It makes it EASY for my customers to find their way around my site!
So think about your site; what are the various topics that you could write about if you were to write about them, could you turn them into some solid cornerstone content pages? Could you then set up a schedule to write a series of blog posts on more specific things within those topics (creating over time dozens of lead generating blog posts which funnel your visitors to your cornerstone pages) – which serve one purpose and one purpose only
To prove your knowledge and expertise and authority status in your business and in your industry!
Why..?
People buy from people whom they know, like, and TRUST.
People also buy from people whom they THINK they know, like and trust!
So as you plan your website redesign, take a moment to sit down with a pen and paper and map out the different topics that your products or services fall under, then look at your pages and ask yourself how you can group them together to make them easier for customers to find and navigate. Lastly, look at your blog (and yes, you DO need a blog), and look at what type of bite-size topics you could write about that fall under the overall umbrella of a major topics.
That’s your plan
Google setup
 Last, but by no means least, we need to look at the way that you set your site up with Google. I’ve seen some classic mistakes here which have cost website owners dearly; so take notes, and follow along.
There are 5 things that you need to do –
- Register your site with Google’s Search Console
- Register your site with Google Analytics
- Connect both your Analytics and Search Console accounts together
- Submit your XML sitemap to Search Console
- Review the reports that are available and apply fixes as necessary.
Let’s break those down one by one….
Register your site with Google’s Search Console
- This is a very simple process where you set up a Search Console account and ‘verify’ your site. There are a number of different ways you can verify your site; the easiest being to add a small .html file to your server which – for Google – shows them you have ownership privileges to the site.
- You can also add a small piece of ‘code’ to your site in either the header or the footer. If you’re using WordPress there are various plugins that can take care of this for you.
- Lastly, the next easiest is to verify your account by ‘verifying’ your Google Analytics account. But you need to have one of those first.
Register your site with Google Analytics
- This is an essential element; and it allows you to start tracking visitor numbers, behaviors, and other marketing metrics which are vital to the growth of your business.
- After setting up and account, you go to the Admin area and click on the ‘get code’ for your site. To add the code, you can either insert it into your header or footer code or, if using WordPress, can add your UA- account number into one of many different plugins which will insert the entire code for you appropriately.
Next you need to connect your two accounts. This can be done via either Search Console or Analytics and allows for data sharing between the two allowing you to have greater access to numbers that can make all the difference in how your run your business.
Submit your XML sitemap to Google’s Search Console.
- This is the best way to get Google to begin crawling your site (for a new site) or take notice of updates for a site rebuild.
- If you’re using WordPress you can install a plugin that will generate an XML sitemap for you, or if using another options where such plugins are not available, there are many online XML sitemap creators you can use.
- Once you’ve created your XML sitemap, you need to submit it via Search Console. Be sure to come back in a week or so and check the results of your submissions to look for any errors.
- If you’ve got a brand new site you should also ‘fetch as Google’ and then submit the home page too.
Lastly, when you come back a week after doing the above, you need to review the reports that are generated by Search Console to check for errors. The main reports you’ll want to look at are –
- Blocked resources
- Crawl errors
- Robots.txt tester
- Security issues.
I’m not going to go through each of these in details as Search Console had both extensive and the latest help resources on them. The important thing is DO THEM.
As a web design company, when we’ve finished the build on a new site for a client, we have our own internal checklist with all these items on it – just to make sure that everything is working fine before handover.
Failure can bring harsh penalties!
Everything on this list is important. Everything that we’ve talked about here needs to be done and none is essentially more important than the other – except perhaps the last….
Case Study Example:

This made the customer want to SCREAM!
We were recently brought in to work on a site where the internal marketing team were really struggling to get their site found in search. The site had been built by an external 3rd party company who was no longer servicing the site (ironically, quite a large local company), and ongoing work was required.
So… the first thing I did was to go through my checklist. I ticked off each item one by one, even those that had already been done, as I need to know that they had been competed correctly.
And most things had, except one!
Cue the biggest angry face you can imagine!
The original site developer hadn’t taken the time to have the site verified with Google’s Search Console; none of the above list has been completed.
Within less than an hour of me starting the Google setup, I discovered that the original developers had failed to remove the small piece of code that is often added to a site during development to tell Google that the site was a ‘development’ site – essentially BLOCKING GOOGLE from even looking at the site!
And the poor hapless customer had no clue!!
Their site had been up and running for over a year and Google hadn’t even indexed it. OMG! Cataclysmic fail!
The problem is… that was the SECOND TIME I’d seen that error in as many months. And it’s the same error that a number of years ago during a live Q & A session that Matt Cutts (then Google’s go-to guy for web tech discussion), had said “This is the Number One Mistake I see Website Owners Making”.
Oh my.
Such a simple mistake with such devastating results.
So the question for you is… how can you avoid making the same mistake (s)?
Have Your Own Checklist
 After I completed my own site rebuild at the end of last year, I sat down and starting looking through the page. I took some notes. I scheduled time to plan a few fixes. And I created a checklist of everything else that still needed doing.
I’m actually still working on that list!
Here’s the thing; just because a website is built, doesn’t mean it is finished.
As I went through my own site, and started making notes of what else needed doing, I came up with a completed list of over 70 items – and I’m talking EVERYTHING here – not just tech stuff, not just page content, but everything, including marketing and sales copy and email automation and so on.
Everything.
I then looked at that list and thought, “I wonder if my customers could use such a list to work with on their own websites?” The answer of course was yes.
And so I added some additional items to the checklist to make sure that it covered all of my clients and their broad range of products, services, and specialties.
In total, our custom marketing checklist has over 100 items on it, each separated into selected categories, which can easily be modified to the individual client’s needs.

A snapshot of your own internal customer ‘client’ checklist!
Here are the categories that are covered –
- Web Tech
- All the stuff that you probably don’t want to know about, but needs to be done on the back end of your site anyway.
- Website Security
- A comprehensive list which makes up our Advanced Website Security and backup service, with a guarantee that if you get hacked (it’s our hack protection service) then we fix your site for free.
- Sales Copy
- This is the section of the site that determines how ‘attractive’ your products and services appear to your customers. We look at a number of ways that you / we can improve on your conversion rates through to leads and sales.
- Email Marketing and Automation
- It’s essential that you automate as much of your marketing as you can, and email is a great way to do so. We help you integrate your Electronic Direct Mail program into your overall marketing strategy.
- SEO – Search Engine Optimisation
- We set up a monthly schedule to work on your keyword rankings and reporting to get your more customers through Google search.
- eCommerce
- Many of our customers also run a shop. Our eCommerce checklist helps you to get the most from your shop; increasing conversions and upsell opportunities.
- Social Media
- Even though you know you need to be active on Social Media, do you know what you need to do? Do you know how to integrate your social marketing with your website to reap maximum benefits from minimum time? We do. And that’s what this section deals with.
- Content Marketing
- One of the top buzz-words in modern marketing. Also one of the most difficult. We help you build a strategy and help you implement it across your marketing channels giving you maximum exposure to build your brand and client database.
There are even opportunities to look at your CRM and other SAAS (software as a service) opportunities that can assist in the running of your business.
Our marketing checklist covers everything that you need to build and run what I call ‘the perfect website’. You can read more about it here.
Which brings us to the end.
The question now is, where are you at, and what are you going to do?
As I’ve pointed out throughout this document, at PaulBarrs.com we do websites; websites and more – that’s our tag line.
We build new websites, we redesign old ones. We take crappy ones that aren’t working, and we fix them up so they’re producing profits.
We help YOU to BUILD THE ONLINE SIDE of your business.
We have a small and dedicated specialist team who love doing nothing more than turning around bad websites and returning them as top notch marketing platforms.
Our goal is to help you position your business as the industry authority, so that when your customers think of buying what you sell – they think of buying from you!
It’s your choice, now, to make this happen.
You can have a go at doing everything above yourself and save a few bucks, or you can give us a call (send us an email) and ask for help.
We’ll get you started on the right path, fix your website up, and then get you set up with our marketing checklist. Success in business… is that simple.
Warm Regards,
Paul Barrs
Glossary
API – short for Application Programming Interface, this is a set of functions that allows the creation of applications that access the features and/or data of an operating system, application, or other service.
Caching – the temporary storage of web documents, which reduces bandwidth usage and the load on the server. Caching may be stored to improve these elements during later visits.
Clone site – an exact copy of the original, active site, created as a back-up.
CMS – content management system. This is the software application or set of related programs, that are used for creating and managing digital content.
Content Delivery Network (CDN) – a network of servers and data centres spread across the globe. They offer benefits such as lower bandwidth costs, faster load times, and greater availability.
CSS – short for Cascading Style Sheets, this programming language describes how the HTML elements will be displayed on each page. It can used for multiple pages within a website.
Divi Builder – an editing program that allows users to add content and edit designs. The Visual Builder is designed for less experienced users, as they can see the changes that they are making as they happen, and edit accordingly.
GZIP – a software application that is used to compress and decompress files, and a file format. GZIPping files enables faster network transfers, which load more quickly, improving user experience.
H1 tags – shown as <h1>, these are the header tags, and usually denote the post title or emphasised text.
.htaccess – short for Hypertext Access, this is a configuration file that controls the directory within Apache-based web servers.
JavaScript – a computer programming language that is usually used to create interactive elements.
Meta Description – the page description that appears below the meta title in search engine results.
Meta title – the webpage title that appears as the big blue link in search engine results. It is used by search engines as the results’ title for that page.
Offsite – it is usual for copies of important information to be stored at another location online.
Permalinks – the permanent web address for each page.
Pingbacks/Trackbacks – notifications sent automatically when another site creates a link to a blog post.
Plugins – a piece of software which adds a specific feature to a website or program.
Robots.txt tester – this checks how search engines crawl your site, which helps to determine its ranking.
Shortcodes – these are small files that allow designers to easily embed files or create objects that would normally require a great deal of complicated coding.
Software as a Service (SaaS) – a licensing and delivery method where software is licensed on a subscription basis and is hosted centrally. Also known as “on demand software”.
SSL certificates – these are small data files that digitally bind a cryptographic key to an organisation’s details, so securing the website.
Staging site – a private website that enables website owners to preview the site before it is made public.
URL – Uniform Resource Locator, also the webpage address.
Wp-config.php – this is one of the core WordPress files, which contains information such as the name, host, username and password.
xmlrpc.php – this is a file that hackers use to try to log-in to WordPress sites as it allows them to try as many username/password combinations as they can enter, with a single command.